Manual: Difference between revisions
| Line 153: | Line 153: | ||
==== Localization ==== | ==== Localization ==== | ||
Before you start using any of the simulated computers, it's good to verify and change the layout when suitable. In the simulation view, open the Settings -> Input Settings panel and change the keyboard mapping to match your current keyboard or select the layout that is a closest match to your keyboard layout. After the change you need to exit to Breadbox Main page, before the new keyboard layout is activated on selected computer. | Before you start using any of the simulated computers, it's good to verify and change the layout when suitable. In the simulation view, open the Settings -> Input Settings panel and change the keyboard mapping to match your current keyboard or select the layout that is a closest match to your keyboard layout. After the change you need to exit to Breadbox Main page, before the new keyboard layout is activated on the selected computer. | ||
Currently available keyboard layouts are: | Currently available keyboard layouts are: | ||
Revision as of 17:55, 19 November 2021
Setting Up
Prerequisities
Recommended system requirements.
- OS: Windows 10 (64-bit)
- Processor: Intel Core i5-760 or equivalent AMD CPU
- Memory: 8 GB RAM
- Graphics: NVIDIA GTX 1060 3GB / AMD RX 470 4GB or equivalent (DirectX 11 compatible).
- Resolution: Designed for Full HD 1080p resolution (1920 x 1080).
- Storage: 2 GB available space
Minimum system requirements are somewhat less than recommended. We cannot give exact minimum system specifications at this stage of the project. So to be on the safe side, verify that your system CPU and GPU performance are close enough (>80%) compared to recommended setup.
Install Breadbox
Breadbox is available on Steam soon.
- Download and install Steam client (if you don't already have it).
- Create Steam account (if you don't already have one).
- Purchase your personal copy of Breadbox from the Steam Store page or using Steam client.
- Open your Steam Library and select Breadbox.
- Click Install
- You are good to go. Click Start.
Install emulator
VICE (VICE IOI)
- Start The Breadbox if it's not running.
- Select any Commodore computer on the Main Menu. (Currently there are no other brands)
- When the selected computer scene is open. Open Settings panel from the left side bar.
- Click Setup near the Emulator label.
- On the popup window, note the About VICE tab to find out more about VICE (and VICE IOI).
- On the popup window, activate Setup Emulator tab and click Next.
- Verify the installation path and choose another one if you prefer.
Note! Please do not include any Windows standard folder (e.g. Program Files) here.
(Using Windows standard folder would reguire the application to switch to admin mode. This functionality is not yet implemented, so we suggest you use another path here, for example the suggested default path.) - Click Install
- Wait about a minute for download and unpack to finish.
- Installation is ready, when you see a text VICE IOI is intalled together with OK button.
- Click OK.
After the installation is done, the emulator integration is immediately active on all Commodore brand computers (You don't need to do installation again on the other models).
You can now turn ON the computers and enjoy the simulation with emulation :)
Updating emulator
When a new improved emulator version is available, the Breadbox will ask you to update the emulator. Just follow the same procedure as described above, in the Install Emulator.
Setup Breadbox Library
Breadbox library will contain the collection of software and manuals you wish to use in the simulator. In this step you will be instructed how to set it up in a recommended way. You may also set up only the parts (folders) relevant to your usage and set other parts when the need arises. Eventually this step will be automated, but currently you have to do it manually. So just open the Windows File Explorer and create the base folder (for example: C:\opt\Breadbox Library).
It's recommended to setup a logical directory structure for your library. At a minimum you should separate the files per computer model, but in addition it can be handy to separate files also per media (tape, diskette, cartridge or book/document).
Recommended directory structure
..\Breadbox Library
  |- c64
  |  |- books
  |  |- cart
  |  |- disk
  |  |- tape
  |- pet
  |  |- books
  |  |- ...
  |- vic20
  |  |- books
  |  |- ...

When you have set up the directories, you also need configure them in Breadbox.
- Open Breadbox and select one of the computers, whose libraries you want to configure.
- Open Settings panel from the left side bar.
- Select Libraries tab.
- Browse and select the folders you wish to attach as Breadbox library.
When you have set up the directories, you can now access the software libraries from the simulators left side panel media icons.
Get Started
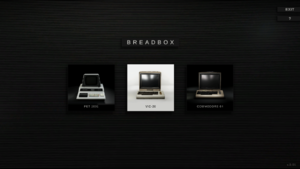
Main Menu
Main Menu shows all the computers available.
The computer simulation will start by clicking on any computer model image. You can also see specifications of each model by clicking an info icon on the top-right corner of the image.
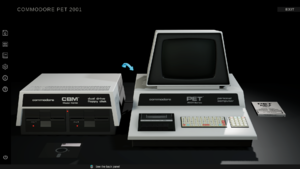
Simulator View
Simulator View is a virtual desktop that displays a simulation of the selected computer and its peripherals.
You can interact with a various items, like diskettes, tapes, switches and buttons with your mouse. You can also change a camera view to a different predefined camera close ups by pointing an object or a hotspot, and using mouse scroll or mouse buttons to trigger the change. Right mouse button will reset the camera view back to default state.
Each computer model has personalized, slightly different simulator view, but they all follow the same UI-logic.
Hotspots
In addition to zooming in to different peripherals, scene contains few additional hotspots to allow easy access to some important view angles.
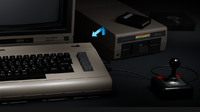
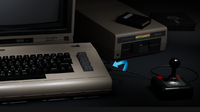
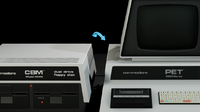
Access the hotspots by hovering the mouse cursor close enough.
Powering Up
When the emulator has been set up, you can power up the computers. Use the hotspots on the simulator view to access the power switches. Turn on the computer by clicking the switch. Depending on the model, you need to turn on the monitor as well. You can also use the shortcut power icon on the bottom-left corner of the screen. It will set all the powers on (or off) for you.
Libraries
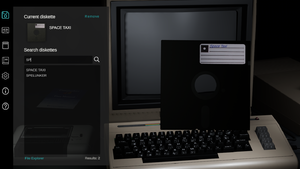
Software
Software libraries can contain "image" files of old media formats. The image file contains the content of an entire floppy disk, cassette tape or cartridge. When you have added files (in supported file format) into your library, they will be accessible in the Breadbox simutor view. Open any library from the left-side navigation icons to see your library content for selected media format. When the library panel is open you can search the content, create a new blank (tape or disk), or select any single image file as active content. The active content you have selected, will be displayed in the simulator as a 3D model of cartridge, floppy disk or cassette. You can interact with the selected 3D model in the simulator. Simulated interactions support the most relevant common actions used in the real world, for example, insert/remove disk, insert/eject/play tape, attach/detach cartridge.
Supported File Formats
- Floppy disks: D64
- Tape: TAP
- Cartridge: CRT
Books
You can add manuals, magazines and other kind of documents into the book library. Book library supports files in PDF-format. Activated book will be displayed in the simulator view as a 3D model of a book. You can open the active book in to your PDF-viewer, either by clicking on it in the simulator view or pressing open button in the library. The book cover page will be displayed in the simulator view, if you provide an image file for it. The image file should be in PNG-format and have a same name as the pdf-document.
Keyboard Mappings
Computer keyboard layouts are not what they used to be. A standard PC keyboard does not have all the same keys as a retro computer. Luckily enough, the basic keys are almost all the same.
Breadbox uses symbolic mapping of the keys. Meaning that, most of the time the keys you type on your PC, will 'press' the same keys or the keys that produce the same result on the simulated computer. Some essential keys on the retro computer, which don't have a counter-part on your PC keyboard are mapped to some otherwise available keys. You can easily just try to press some of the keys on your keyboard and you will notice which keys are pressed in the simulated computer. As an alternative you can always use the simulator view to zoom in to the keyboard and click any key with your mouse pointer.
Localization
Before you start using any of the simulated computers, it's good to verify and change the layout when suitable. In the simulation view, open the Settings -> Input Settings panel and change the keyboard mapping to match your current keyboard or select the layout that is a closest match to your keyboard layout. After the change you need to exit to Breadbox Main page, before the new keyboard layout is activated on the selected computer.
Currently available keyboard layouts are:
- US - American
- UK - British
- DE - German
- IT - Italian
- FI - Finnish
- SE - Swedish
The simulated computers in the Breadbox, will only have US-localized keyboard layout.